Shopify
Shopify channel integration
Integrating Shopify with Avasam lets you download orders, as well as controlling stock levels and prices.
Integrating a Shopify store
If you already have an Avasam account setup, then you can integrate your Shopify store as shown in this video. We also have separate articles for listing, as well as shipping mapping and type mapping.
If you subscribed to Avasam from Shopify, you must cancel your subscription from Shopify if you want to unsubscribe from Avasam. Please cancel and uninstall Avasam from your Shopify store.
Ensure your Shopify orders have all been updated before doing so, and your Avasam products have been removed from your store, or they will need to be updated manually.
Getting started from scratch
When first getting started with Avasam and a Shopify store, however, this video covers everything, from signing up, integrating your Shopify store, to listing your first products!
Shopify integration
Avasam can be integrated with one or more Shopify sites to download orders, and update listings with stock levels. Avasam also provides a Shopify listing tool.
The list of sales channel integrations has 4 columns:
- The logo represents the type of channel integration.
- The type of channel integration.
- The name of the specific channel integration.
- The status of the integration - yes/blue is enabled, no/grey is disabled.
New sales channel integration
To create a new sales channel integration:
Open ‘Settings’.
Select ‘Sales channel integration’.
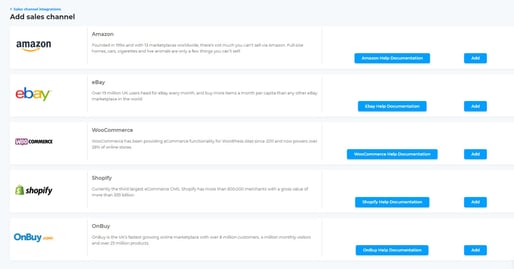
Click the ‘Add sales channel’ button.
Click on the ‘Add’ button next to ‘Shopify’.
Enter the name for this integration.
.png)
- Click ‘Next’ to continue.
.png)
Enter the address of your Shopify website as the ‘Website end point’.
Click ‘Next’.
Authorise your connection with Shopify by clicking ‘Authkey’.
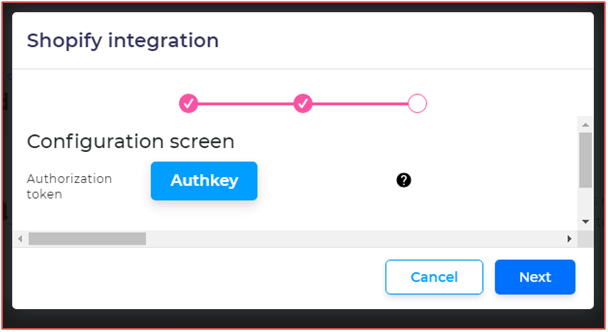
- Click ‘Authkey’.
a. Enter the email address registered to your Shopify account.
.png)
b. Click ‘Next’.
c. Enter your Shopify password.
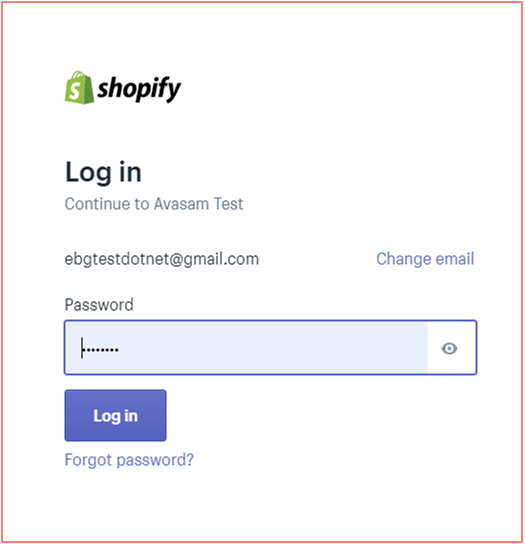
d. Click ‘Log in’.
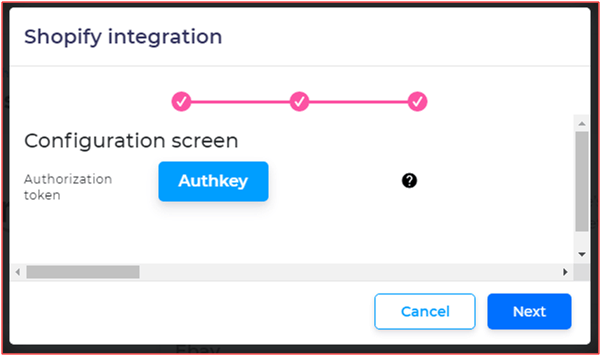
e. You’ll see your authorization, before returning to Avasam.

- Click ‘Next’ to continue.
The integration will create an inventory location in Shopify called avasam that will be used for stock level updates. You can select a different location.
You'll be asked to select (from a list) the order statuses that will be downloaded from Shopify to Avasam (The default is 'Paid, Unfulfilled').
You can set the status the orders will be updated to in Shopify when the order is dispatched in Avasam (The default is 'Paid, Fulfilled').
Save the changes when you're happy with the options.
You will be returned to the sales channel list in Avasam, with a new row added for your new integration.
.png)
To enable automatic fulfillment, you need to make an update in your Shopify store to support the fulfillment through Avasam now. Otherwise you will need to manually authorise each order
In your Shopify store, select settings.
Select the checkout option.
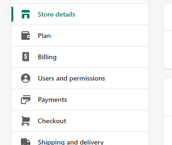
Go to the order processing section.
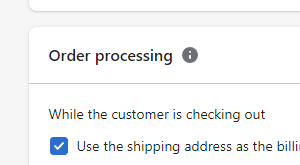
Under after an order has been paid, select the option automatically fulfill the order's line items.
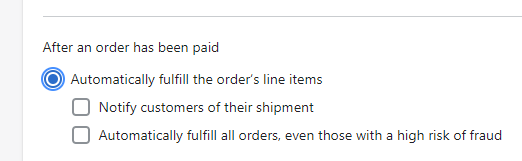
Click on save.
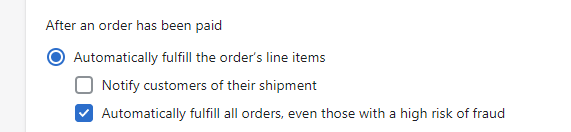
Optionally, you can also enable the option to fullfill all orders and ignore Shopify's fraud prevention functionality.
Ensure that your channel has stock updates enabled to ensure that your listings don't oversell.
- Click on the channel name.
- Click on additional settings.
- Toggle the switch for stock update to yes.
- Click save.
Manually authorise Shopify orders for fulfillment
If you choose to not enable automatic fulfillment, you'll need to manually authorise all orders to be passed to Avasam for dispatch. this may cause delays in the customer receiving their items, however.
- In the order, open the details for the selected order(s).
- Click the request fulfilment button on the orders to be dispatched through Avasam.
- Click on send fulfillment request button to pass the orders to the queue. Avasam will download them on the next sync.
Disable channel integration
When you create new channel integration, it is automatically enabled and active.
To disable the integration to stop it downloading orders and updating listings temporarily:
- Open ‘Settings’.
- Select ‘Sales channel integration’.
- Locate the integrated sales channel to disable.
- Click the status switch to toggle it from ‘Yes’/active to ‘No’/disabled.
- The channel will be disabled.
Enable channel integration
When you create new channel integration, it is automatically enabled and active. You, or someone else, may temporarily disable it.
To re-enable the integration to resume downloading orders and updating listings:
- Open ‘Settings’.
- Select ‘Sales channel integration’.
- Locate the integrated sales channel to enable.
- Click the status switch to toggle it from ‘No’/disabled to ‘Yes’/active.
- The channel will be re-enabled.
Remove channel integration
If you no longer wish to have Avasam connected to a sales channel, it can be easily removed. Once deleted, you will need to re-create the integration from scratch should you choose to re-use it.
To remove channel integration:
Open ‘Settings’.
Select ‘Sales channel integration’.
Locate the channel integration you want to remove.
To open the integration, click the name.
Click the red ‘Remove account’ button.
.png)
Click ‘OK’ to confirm.
You will be returned to the list of channel integrations.
- Click ‘Cancel’ if you decide to not delete the integration.
- If you delete integration and then reintegrate the same channel, the analytics and reports will not recognise orders from the two integrations as being from the same site.
Update/verify channel integration
If Avasam is having issues downloading from updating a sales channel, it can be easily checked. In ‘Settings’, select ‘Sales channel integration’ to ensure that you are connecting to the correct website end point.
To update/verify channel integration:
Locate the channel integration.
Click the name to open the integration.
Click ‘Reauthorise’.
A new window will open.
Click ‘Authkey’ to request a new token from Shopify.
Click ‘Save’ to apply any updates/changes.
You will be returned to the list of channel integrations.
Additional settings for Shopify
The Shopify integration has additional settings which can be customised.
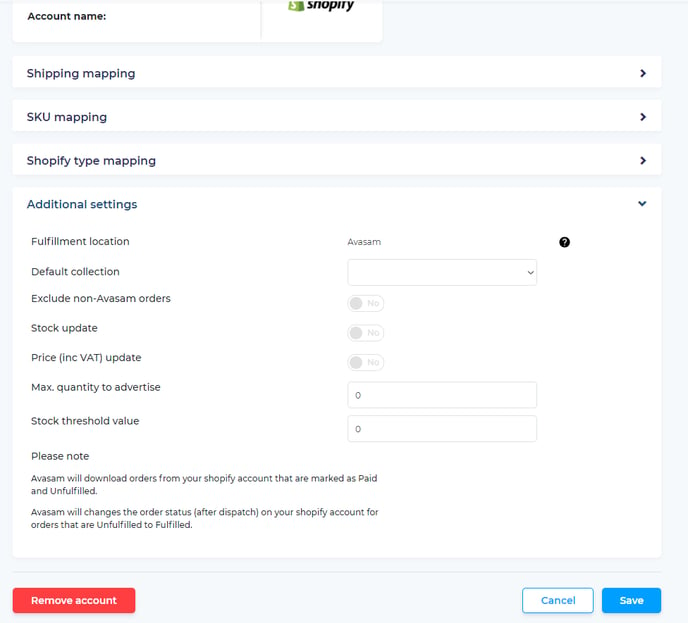
Default collection: Where collection locations are offered in Shopify, set which one will be used for orders shipped via Avasam. Click to open drop down list and select option.
Stock update: When enabled, Avasam will provide inventory updates to mapped listings on Shopify when the levels change in Avasam. Click to toggle between on and off.
Price (inc VAT) update: When enabled, Avasam will update prices on mapped listings when you change them in my products in Avasam. Click to toggle between on and off.
Max quantity to advertise: Set the maximum number of an item you want the Shopify listing to show for any listing mapped to an Avasam SKU.
If the stock level is higher than this number, it will be maintained at this value until you have less available.
If the level becomes lower than this point, the inventory level updates the listing dynamically.
Once the level increases past the value set, the listing will maintain this level again.
Requires stock update to be set to yes.
Stock Threshold value: Set the stock level of an item you want the Shopify listing to treat as zero (out of stock) for any listing mapped to an Avasam SKU.
If the stock level is higher than this number, it will not affect the listing.
If the level becomes lower than this value, the inventory level updates are set to 0 for the listing.
Once the level increases past the value set, the listing will maintain the correct level updates again.
Requires stock update to be set to yes.
Excluding non-Avasam orders
Avasam can download orders for products not linked in Avasam - This is useful if you don't immediately map listings after creating them. Alternatively, if you sell some of your own stock alongside Avasam orders, it can clutter up the order screen. Non-Avasam orders are deleted after 3 days if not for mapped products.
To avoid seeing those orders:
- In ‘settings’, select ‘sales channel integration’.
- Find the relevant channel integration and click its name to open the integration.
- Scroll down to the 'additional settings' section heading.
- Click on the 'additional settings' section heading to open up the settings menu.
- Set the exclude non-Avasam orders switch to off, or grey.
- Click ‘save’ to apply any updates or changes to Avasam.
- You will be returned to the list of channel integrations.
You cannot make exclude non-Avasam orders and split orders with unknown SKUs active simultaneously, only one at a time can be active, or neither.
Splitting order containing Avasam and non-Avasam SKUs
Where some of your orders contain a mix of Avasam and non-Avasam products, this setting allows you to process the Avasam products and not import the unknown items. When set to no, you will only import these orders if exclude non-Avasam orders is set to no.
To enable this:
- In ‘settings’, select ‘sales channel integration’.
- Find the relevant channel integration and click its name to open the integration.
- Scroll down to the 'additional settings' section heading.
- Click on the 'additional settings' section heading to open up the settings menu.
- Set the split orders with unknown SKUs switch to on, or green.
- Click ‘save’ to apply any updates or changes to Avasam.
- You will be returned to the list of channel integrations.
Listing a product in your Shopify store
- Open listing manager.
- Open the listings option for the chosen Shopify store.
- Select one or more products to list that don't have the error or listed icons by their entry (or filter for unlisted) by selecting/ticking the left hand box for the product(s).
- Click on list at the bottom of the screen.
- Avasam should report 'item listed successfully'.
- The screen will refresh. You may need to change the filter settings to show the product(s).
- If there is an error with the process, then this will be reflected by an error icon (see below). Otherwise the status will change to listed.
Should an error be reported, try to identify the issue. If necessary you can contact support for assistance.
When listing products to your store, both with and without using the Avasam listing tool, in order to map the product correctly so that orders for the product can be processed, you will need to go into the mapping tool to download the latest listings after they have been created:
- Open settings
- Open channel integrations
- Click on the channel to open the settings
- Click on SKU mapping to expand the section
- Select download from the drop down list. This may take several minutes.
- Click on the SKU mapping tool button.
-- If the items were listed in Avasam , or using the Avasam SKUs, then click on the action available option, and select automap SKUs.
-- If the items were listed with a different SKU, then follow the instructions for SKU mapping. - Click close when you have finished.
If you change your mind about updates you are making to products for listing, then you can click cancel to leave the screen and abandon changes.
If you are interrupted and want to come back and finish later, then selecting the products and clicking action, then save will keep them saved for later.
Updating listings
If you want to update listings, price etc for one of more products on Shopify, then you can do so as follows:
- Open listing manager.
- Open the listings option for the selected Shopify store.
- Select 1 or more products that are listed (you can filter for unlisted) by selecting/ticking the left hand box for the product(s).
- Update the details for those products.
- Check the updates are correct.
- Click on update at the bottom of the screen.
- Avasam should report 'item updated successfully'.
- The screen will refresh. You may need to change the filter to show the product(s).
- If there is an error with the process, then this will be reflected by the error icon (see below). Otherwise the status will change to listed.
Deleting listings
If you no longer want a product to be listed on Shopify, then you arrange this by following these steps:
- Open listing manager.
- Open the listings option for the selected Shopify store.
- Select 1 or more products that are listed (you can filter for unlisted) by selecting/ticking the left hand box for the product(s).
- Click on action at the top of the screen.
- Select delete.
- Avasam should report 'item removed successfully'.
- The screen will refresh. You may need to change the filter to show the product(s).
- If there is an error with the process, then this will be reflected by the error icon (see below). Otherwise the product(s) will be shown as not listed.
When 1 or more products have been selected, the action drop down allows you to choose whether to list, save or delete those products.
Listing manager
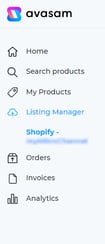
The listing manager can be opened from the menu to the left of the Avasam screen. This allows you to add products to your Shopify store, check their status and update them.
It contains information about the integrated channels and their current status (order sync, price sync, stock sync, all show the time this last occurred). It also contains information about the listings on the individual stores.
The listing manager shows the products in your inventory and their status on your Shopify store (listed, not listed, error). You can search for a product or filter the products shown using the controls along the top of the screen.
The columns and controls are as follows:
| Field | Description |
|---|---|
| Column/control | Purpose |
| Select/Select All | Toggle selection of one or more products/rows to apply an action to. Ticking select all ticks all rows. |
| Image | Primary image for product |
| Avasam SKU | Product identifier/SKU in Avasam inventory |
| Variation | Shows if product is in a variation, and if it's a child product or a parent product |
| Title | Title of product - as will be shown in the product listing on Shopify |
| Description | Click to open edit window for product listing description |
| Category | Avasam catalogue category |
| Stock | Number currently available in stock |
| Cost Price exc | Cost price specified by supplier |
| Shipping Price exc | Shipping price specified by supplier - can be edited for listing |
| Selling Price (Inc VAT) | Price to sell on channel (If pricing rule is setup, then this will show auto instead of allowing editing) |
| Product type | Product type in Shopify store |
| Collection | Product collection in Shopify store |
| Status | Can filter or order by listed, not listed or error |
You can also click on the listing manager entry on the left to toggle it and show the available integrated channels with listing tools as subcategories. Clicking on one of these is the same as clicking the listings button.
Checking the status of listings in my products
In the my products page, click on columns. Click on default columns to expand the selection, and check the entry for your integrated Shopify channel to show it in the product list. You can add columns for more than one integrated Shopify store here.
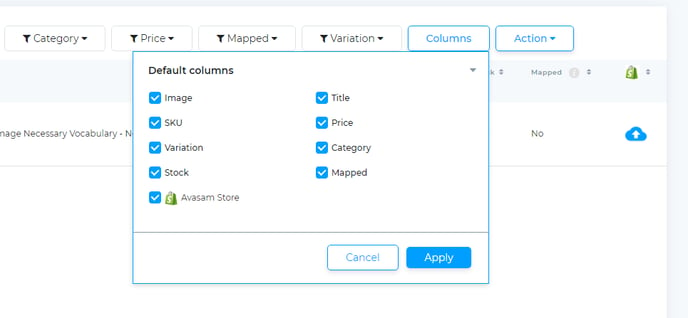
Click apply to save the change. This adds one or more new column(s) to your my products list.
This shows the status of the product on your Shopify store.
| Icon | Status |
|---|---|
 | Correctly linked to listing on Shopify and listed via the Avasam listing tool |
 | Correctly linked to listing on Shopify but not listed via the Avasam listing tool |
 | Error when listing or updating on Shopify |
 | Not yet listed or linked on Shopify, but can be listed |
Shopify SKU mapping
This guide ensures that Avasam can fulfil and invoice your Shopify orders with the correct items.
SKU mapping makes sure that Avasam knows which items in a particular order correlate with items in your inventory.
If the product isn't mapped, Avasam can't direct the order to the right supplier and raise the correct invoice. This means that your order won't be shipped
If you want Avasam to automatically recognise the correct inventory SKU when the order is downloaded, then you will need to ensure all SKUS are mapped correctly from Shopify.
Editing existing SKU mappings
The SKU mapping tool will list all existing mappings. You can expand this section by clicking on the arrow to the right of the title. This will open a new window that includes information about the products in your inventory, and the listings available on the integrated account.
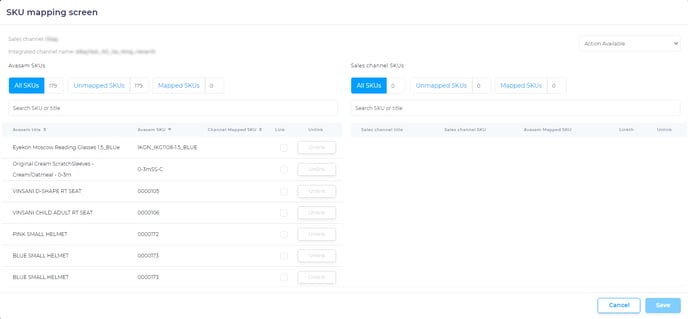
Create a new SKU mapping
To create a new SKU mapping:
- You can search for the listing you want to map by entering all or part of the SKU or title into the search bar under sales channel SKUs.
- Select 'download' from the actions available field to grab the latest information from the site if the listing is not shown.
- Search for the SKU you want to map under the sales channel SKU heading, or by scrolling down the list.
- Search for the Avasam SKU to map this against under the Avasam SKU heading, then select the SKU and click ‘map them’ to the right of it.
- Click 'save' to apply this mapping to Avasam.
To further filter the listings and products shown in either list, use the unmapped SKUs and mapped SKUs options. This will reduce the volume of results shown
Changes made will only affect orders downloaded after new mapping is in place. It will not affect orders already in Avasam.
Delete a SKU mapping
To delete a SKU mapping:
- You can search for the listing you want to change by entering all or part of the SKU or title into the search bar under Avasam SKUs or sales channel SKUs.
- Click the unlink button to sever the mapping.
- Click 'save' to apply this change of mapping to Avasam.
Shopify shipping mapping
This guide ensures that Avasam can fulfil and invoice your Shopify orders with the correct shipping services for the supplier.
If you want the shipping service paid for by the customer to automatically select the correct shipping provider and service when the order is downloaded to Avasam, then you will need to map the services from the site/channel to those in Avasam.
The ‘Shipping mapping’ section will list any existing mappings. You can open/expand it by clicking on the arrow to the right of the title. This will open a new window that includes information about the available Avasam shipping services, and the services available on the integrated account.
If any services are already mapped, then they will be listed here.
Delete a shipping mapping
To delete a shipping mapping:
- Locate the service.
- Click the ‘X’ to the right of the service.
- Click ‘Save’ to apply the change.
Create a new shipping mapping
To create a new shipping mapping:
- Select the Shopify shipping service to map under the ‘Sales channel shipping service’ drop down list.
- Select the Avasam shipping service to map this against under the ‘Avasam shipping service’ drop down list.
- Click map field.
- This will only affect orders downloaded after it is mapped.
It will not affect orders already in Avasam.
Listing on Shopify with Avasam
With the Avasam listing tool, it's easier than ever to add your products to your Shopify store
Before you can list a product you must ensure that you have sourced products and integrated your Shopify store.
Ensure that the title, description, shipping price and selling price are correct before listing a product.
Shopify type mapping
Shopify maintains categories or types. To get the best performance for your products, you should map the types in Shopify to Avasam categories
When working with your products in Shopify, mapping Avasam categories to Shopify types will help to ensure that product updates and orders are handled correctly.
Editing existing type mappings
The Shopify type mapping section will list all existing mappings. You can expand this section by clicking on the arrow to the right of the title. .png)
Create a new type mapping
To create a new type mapping:
- Search for the Shopify type you want to map under the Shopify Type heading, or by scrolling down the list.
- Search for the Avasam category to map this against under the Avasam category heading, then select the entry and click ‘map’ to the right of it.
- Click 'save' to apply this mapping to Avasam.
- Changes made will only affect orders downloaded after new mapping is in place. It will not affect orders already in Avasam.
- You can return to the main page at any time without applying the changes by clicking on the sales channel integrations link on the top left, or the cancel button.