Wish
Wish channel integration
Avasam can be integrated with one or more Wish accounts to download orders, confirm order dispatch, and update listings with stock levels.
New Wish integration
To create a new WIsh integration:
- Open Settings.
- Select Sales channel integration.
- Click the Add sales channel button.
- Click on the Add button next to Wish.
- Enter the name for this integration.
- Click Next’ to continue.
- Click on the Authkey button.
- Log into your Wish account in the new tab it opens (This will not appear if you are already logged in).
- Click Allow access to give Avasam permission to connect to your Wish store.
- Click Confirm.
- Close the tab when it confirms the authorisation token has been saved.
- Back in Avasam, set your Default Currency, currently use the codeGBP.
- You need to set a warehouse name, such as Default .
- Click Next.
- You will be returned to the sales channel list in Avasam, with a new row added for your new integration.
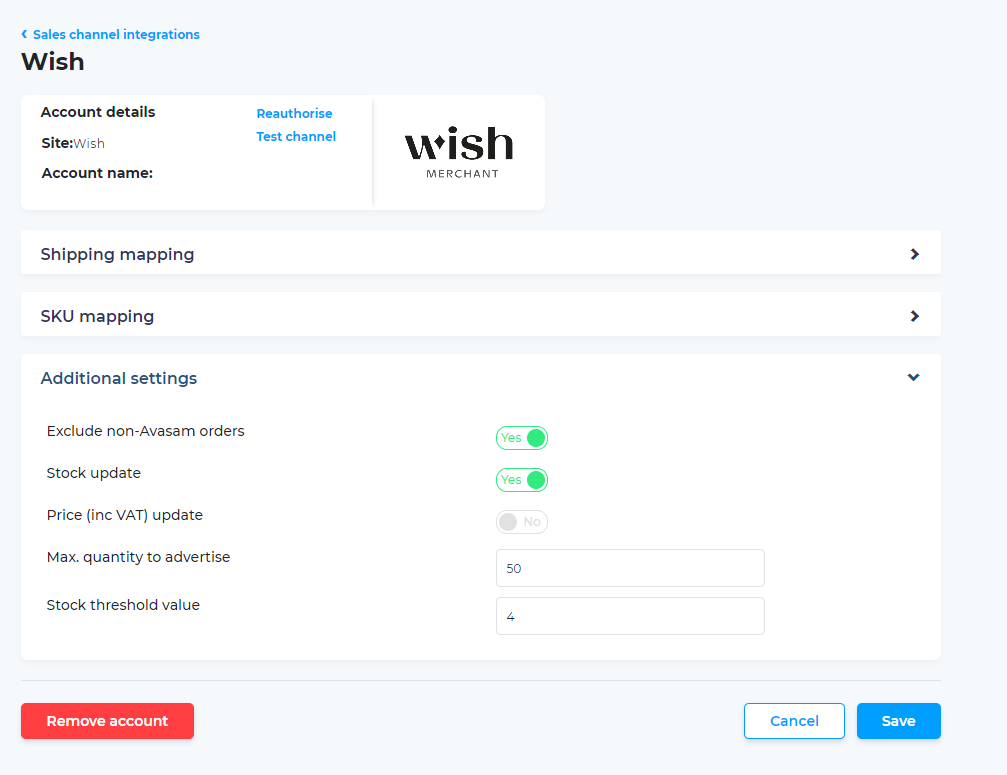
Ensure that your channel has stock updates enabled to ensure that your listings don't oversell.
- Click on the channel name.
- Click on additional settings.
- Toggle the switch for stock update to yes.
- Click save.
Disable channel integration
When you create a new channel integration, it is automatically enabled and active.
To disable the integration to stop it downloading orders and updating listings temporarily.
- Open ‘Settings’.
- Select ‘Sales channel integration’.
- Locate the integrated sales channel to disable.
- Click the status switch to toggle it from ‘Yes’/active to ‘No’/disabled.
- The channel will be disabled.
Enable channel integration
To create a new channel integration, it is automatically enabled and active. You, or someone else, may temporarily disable it.
You can re-enable the integration to resume downloading orders and updating listings.
- Open ‘Settings’.
- Select ‘Sales channel integration’.
- Locate the integrated sales channel to enable.
- Click the status switch to toggle it from ‘No’/disabled to ‘Yes’/active.
- The channel will be re-enabled.
Remove channel integration
If you no longer wish to have Avasam connected to a sales channel, it can be easily removed. Once deleted, you will need to re-create the integration from scratch should you choose to re-use it.
To remove a channel integration:
- Open ‘Settings’.
- Select ‘Sales channel integration’.
- Locate the channel integration to remove.
- To open the integration, click the name.

- Click the red ‘Remove account’ button.
- Click ‘OK’.
- You will be returned to the list of channel integrations.
- If you delete an integration and then reintegrate the same channel, the analytics and reports will not recognise orders from the two integrations as being from the same site.
Update/verify channel integration
If Avasam is having issues downloading from updating a sales channel, it can be easily checked. In ‘Settings’, select ‘Sales channel integration’ to ensure that you are connecting to the correct website end point.
To update/verify a channel integration:
- Locate the channel integration.
- To open the integration, click the name.
- Click ‘Reauthorise’.
- Check the ‘Authentication token’ is correct.
- Check the ‘Refresh token’ is correct.
- Check the ‘Client ID’ is correct.
- Check the ‘Client secret’ is correct.
- Click ‘Save’ to apply any updates/changes.
- You will be returned to the list of channel integrations.
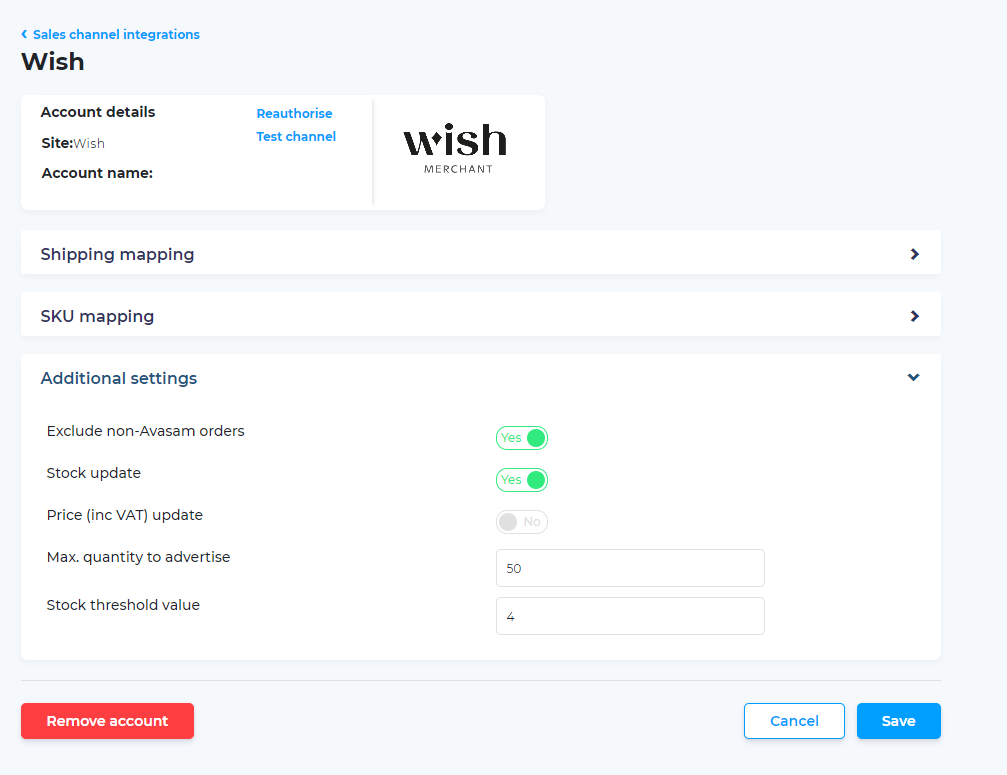
Excluding non-Avasam orders
Avasam can download orders for products not linked in Avasam - This is useful if you don't immediately map listings after creating them. Alternatively, if you sell some of your own stock alongside Avasam orders, it can clutter up the order screen. Non-Avasam orders are deleted after 3 days if not for mapped products.
To avoid seeing those orders:
- In ‘settings’, select ‘sales channel integration’.
- Find the relevant channel integration and click its name to open the integration.
- Scroll down to the 'additional settings' section heading.
- Click on the 'additional settings' section heading to open up the settings menu.
- Set the exclude non-Avasam orders switch to off, or grey.
- Click ‘save’ to apply any updates or changes to Avasam.
- You will be returned to the list of channel integrations.
You cannot make exclude non-Avasam orders and split orders with unknown SKUs active simultaneously, only one at a time can be active, or neither.
Splitting order containing Avasam and non-Avasam SKUs
Where some of your orders contain a mix of Avasam and non-Avasam products, this setting allows you to process the Avasam products and not import the unknown items. When set to no, you will only import these orders if exclude non-Avasam orders is set to no.
To enable this:
- In ‘settings’, select ‘sales channel integration’.
- Find the relevant channel integration and click its name to open the integration.
- Scroll down to the 'additional settings' section heading.
- Click on the 'additional settings' section heading to open up the settings menu.
- Set the split orders with unknown SKUs switch to on, or green.
- Click ‘save’ to apply any updates or changes to Avasam.
- You will be returned to the list of channel integrations.
Wish SKU mapping
This guide ensures that Avasam can fulfil and invoice your Wish orders with the correct items.
If the product isn't mapped, Avasam can't direct the order to the right supplier and raise the correct invoice. This means that your order won't be shipped
If you want Avasam to automatically recognise the correct inventory SKU when the order is downloaded, then you will need to ensure all SKUS are mapped correctly from Wish.
Editing existing SKU mappings
The SKU mapping tool will list all existing mappings. You can expand this section by clicking on the arrow to the right of the title. This will open a new window that includes information about the products in your inventory, and the listings available on the integrated account.
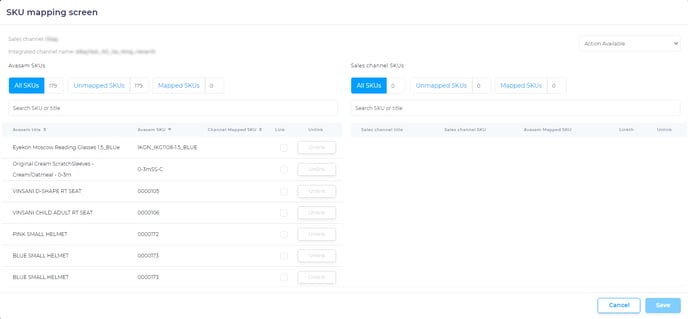
Create a new SKU mapping
To create a new SKU mapping:
- You can search for the listing you want to map by entering all or part of the SKU or title into the search bar under sales channel SKUs.
- Select 'download' from the actions available field to grab the latest information from the site if the listing is not shown.
- Search for the SKU you want to map under the sales channel SKU heading, or by scrolling down the list.
- Search for the Avasam SKU to map this against under the Avasam SKU heading, then select the SKU and click ‘map them’ to the right of it.
- Click 'save' to apply this mapping to Avasam.
To further filter the listings and products shown in either list, use the unmapped SKUs and mapped SKUs options. This will reduce the volume of results shown
Changes made will only affect orders downloaded after new mapping is in place. It will not affect orders already in Avasam.
Delete a SKU mapping
To delete a SKU mapping:
- You can search for the listing you want to change by entering all or part of the SKU or title into the search bar under Avasam SKUs or sales channel SKUs.
- Click the unlink button to sever the mapping.
- Click 'save' to apply this change of mapping to Avasam.
Wish shipping mapping
This guide ensures that Avasam can fulfil and invoice your Wish orders with the correct shipping services for the supplier.
The ‘Shipping mapping’ section will list any existing mappings. You can open/expand it by clicking on the arrow to the right of the title. This will open a new window that includes information about the available Avasam shipping services, and the services available on the integrated account.
If any services are already mapped, then they will be listed here.
Delete a shipping mapping
To delete a shipping mapping:
- Locate the service.
- Click the ‘X’ to the right of the service.
- Click ‘Save’ to apply the change.
Create a new shipping mapping
To create a new shipping mapping:
- Select the service to map under the ‘Sales channel shipping service’ drop down list.
- Select the Avasam shipping service to map this against under the ‘Avasam shipping service’ drop down list.
- Click ‘Map field’.
- This will only affect orders downloaded after it is mapped. It will not affect orders already in Avasam.