Introduction
Getting started as a BigCommerce seller
With the new and improved connection between BigCommerce and Avasam, it's even easier to enhance your store with Avasam inventory.
Getting started
Listing with Avasam
Price rules
Getting started with BigCommerce and Avasam
Check your details
To get started, first check and verify your address and business details, so we know who to invoice when you sell Avasam products.
- Click on Settings (This can be found at the bottom left or top right hand menu).
- Click on Account Settings.
- Review the details already stored and update as needed.
- Ensure you have selected the option to denote if you are an individual or a company.
- Click Save to apply the changes.
If you have a separate registered and trading address, you can enter those here.
Setup payments
Next, you can set up your Payment Settings. We need the details of a payment card here, so that we can automate your order payments and pass orders to your suppliers for dispatch to your customers.
- Ensure you are in Settings.
- Click on Payment Settings.
- Click Add by payment methods.
- Enter the long card number on your payment card.
- Enter the expiry date.
- Enter the CVC (The last 3 numbers on the signature strip of the card, or the 4 digits on the front of an Amex card).
- Enter the name shown on the card.
- Click on Add Card.
- Click Save to apply the changes.
We recommend you set up a desired rolling deposit amount from which your order payments will be drawn.
- Under a**utopay preference, check the amount of the current Deposit**.
- If you wish to edit this amount, lick on the pencil icon.
- Update the amount, and click set deposit amount to apply it.
- Click save to apply changes.
Source products
Before you can start selling, you will need to source some products.
This means finding the items you want to sell in your store , and adding them to your Avasam inventory, or ‘My Products’.
- Click on search products.
- Locate the item(s) you wish to sell on your store in the catalogue. You can:
- Use the filters to narrow down the results based on The Avasam product picks, current stock level, suppliers or other details.
- Click on one or more categories to only show products from them.
- Enter keywords such as the name of the product in the search bar.
- To see more details about a product, click on the image. The product will be opened in a new tab.
- To source a product, click on the source product button in the detailed view, or the source product button can be seen in the catalogue view by hovering over the item.
Listing items
Once you have selected the products you wish to sell, you are ready to start listing them in your BigCommerce store. Our automated product listing tool enables you to do this in just a few clicks.
You can set your product prices manually when you list them, or you can setup automatic pricing rules that will be triggered if your supplier changes the price, so you don't sell at a loss or lose out on sales.
Shipping mapping
Before you list and sell products, we will need to understand what shipping services you would like to use. Shipping Mapping lets you map your BigCommerce store shipping services to Avasam:
- Click on settings.
- Open selling channel Integrations.
- Locate your BigCommerce integration, and click it to open the settings for it.
- In the channel integration settings, expand the shipping integration option.
- To map a service:
- Select a shipping service from your BigCommerce store in the left hand list.
- Select a shipping service from Avasam in the righthand list
- Click map.
When mapped, Avasam knows what service to bill you for in the order invoice. Without this, the order cannot be invoiced and fulfilled until you manually update it.
You can map multiple BigCommerce services to one Avasam service.
Remember that not all suppliers offer all services for their products. Before listing a product, ensure you have mapped a service it can be shipped with to avoid disruption, and ensure that your pricing will cover the cost. You can use pricing rules to ensure the shipping costs are covered.
You can delete mappings using the X to the right of the entry.
Orders screen
The order screen shows you can the orders received from your BigCommerce store, and their status.
Icons are colour coded:
- Paid

- Unpaid

- Dispatched

- Awaiting Dispatch

Any errors are flagged so you can review them.
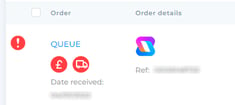
Once an order is shipped by one of our suppliers it will be automatically marked as dispatched in your BigCommerce store including any tracking details.
Listing products on BigCommerce
Sourcing products
You need to ensure you have sourced products to list. This means adding them from the catalogue to your my products list.
- Open the ‘Search Products’ screen.
- You can filter or search the products you see:
- By keywords
- By cost price
- By stock level
- By Supplier
- By category, using hot buttons.
- Click on an item to see it in detail in a separate tab.
- To add the product to your inventory (add to ‘My Products’)
- Click the ‘Source Product’ button in the detail view,
- Click the ‘Source Product’ button when you hover over the item in the catalogue.
Listing single products
Once you’ve sourced some products, we can then move to the Listing Manager.
- Click on Listing Manager.
- Locate the entry for the channel you want to list a product on.
- Click on the listing button
- Locate the item to list in the list shown.
- If not already listed (it will have a blue cloud icon at the far right), then:
- Check and amend the title, if required.
- Check and amend the description, if required. Click on the description icon to view and edit.
- Check and amend the price, unless greyed out with an auto label, because a price rule is active.
- Check the item is in stock.
- Select the category for the item to be added to your store under.
- Click the blue cloud (list) icon to list the product.
- If no error is shown, the status icon should change to a green tick.
- Click on the green tick to open the listing and verify it is correct.
You can filter the list of products by status in the heading of the column.
The status icons in the Listing tool are as follows:
Blue cloud: Item can be listed.
Green tick: Item has been listed with Avasam. Click to open the listing.
Grey tick: Item has been listed without Avasam and mapped to a product, cannot list.
Red exclamation mark: An error has occurred. Click for more details.
When listing products on BigCommerce, remember that the price you send can be inclusive or exclusive of tax. This is defined by the tax settings on your store.
If you change the settings on BigCommerce after sync, your uploaded price will change from inc VAT to ex VAT, or vice versa, so ensure it is all setup correctly before listing or updating prices. Otherwise your prices may be higher than expected.
Listing multiple products
Once you’ve sourced some products, we can then move to the Listing Manager.
- Click on Listing Manager.
- Locate the entry for the channel you want to list products on.
- Click on the listing button
- Locate the item to list in the list shown.
- If not already listed (it will have a blue cloud icon at the far right), then:
- Check/tick the box on the left hand side of the product row.
- You can click the box at the top of the list to select all shown under the current search/filter settings.
- Check and amend the title of each selected row, if required.
- Check and amend the description of each selected row, if required. Click on the description icon to view and edit.
- Check and amend the price of each selected row, unless greyed out with an auto label, because a price rule is active.
- Check the items are in stock.
- Select the category for each item to be added to your store under.
- Click the list button to list the products selected.
- If no error is shown, the status icon should change to a green tick.
- Click on the green tick to open the listing and verify it is correct.
- Check/tick the box on the left hand side of the product row.
Update product listings
Once you’ve listed products, they can be updated from within Avasam.
- Click on Listing Manager.
- Locate the entry for the channel you want to review.
- Click on the listing button
- Locate the item(s) to change in the list shown.
- For each product you want to review, it should have a green tick in the status column.
- Check/tick the box on the left hand side of the product row.
- You can click the box at the top of the list to select all shown under the current search/filter settings.
- Check and amend the title of each selected row, if required.
- Check and amend the description of each selected row, if required. Click on the description icon to view and edit.
- Check and amend the price of each selected row, unless greyed out with an auto label, because a price rule is active..
- Update the category for each item to be added to your store under, if required.
- Check/tick the box on the left hand side of the product row.
- Click the update button.
- If no error is shown, the status icon should remain as a green tick.
- Click on the green tick to open the listing and verify it is correct.
- For each product you want to review, it should have a green tick in the status column.
If at any point you have made changes you don’t want to apply, just click on ‘Cancel’.
Setting up price rules
Avasam can automatically update listing prices when your supplier changes their cost price or shipping price.
Confirm that price updates are on for your BigCommerce store.
- Open settings.
- Select sales channel integrations.
- Click on your BigCommerce integration to open the settings
- Click on additional settings to expand them.
- Ensure price update is enabled.
- Click Save.
- Open settings.
- Click on automate your prices.
- Click on add new rule.
- Enter a name for the rule.
- Select the source, or channel type, to apply the rule to.
- Select the subsource, or channel name, to apply the rule to.
- Set the all suppliers option to no to only apply this rule to products from specific suppliers.
- Select one or more suppliers from the drop down list by checking the box by their name.
- Set the all categories option to no to only apply this rule to products in specific categories.
- Select one or more categories from the drop down list by checking the box by their name.
- Choose the price increase to apply to the cost price, you can use one or both of:
- Enter a percentage to add on top of the cost price.
- Enter a fixed amount to add to the cost price after any percentage is applied.
- If you want to include shipping in the price for the listing, enable the include shipping cost option.
- Prioritise the shipping services Avasam will use if available by dragging and dropping the entries in the list.
- if the first service is available for a product, it's shipping cost will be added to the cost price.
- Otherwise the second service will be used if present.
- The final service will be use only if the other 2 are not available for that product.
- The price decimals round up the price calculated to end with the amount set, eg all prices ending in ".99".
- Review the information provided and check the box marked please acknowledge.
- Click save.
When setting up a rule, remember the settings are applied to the price of the product/listing as follows:
- The product cost price is £7.50.
- The shipping is included, and costs £2.50, making the cost price £10 .
- With 25% added it would become £12.50.
- With £2 added as a fixed amount, it would become £14.50.
- With the decimals set to ".99" it would be rounded up to £14.99.